A Comprehensive Guide to Setting Up a Proxmox Server
 Small Server
Introduction
Setting up a Proxmox server can be a powerful solution for virtualization and container management. In this guide, we will walk you through the step-by-step process of setting up a Proxmox server, covering various aspects like updating repositories, configuring storage pools, enabling SMART monitoring, setting up PCI passthrough, making Proxmox VLAN aware, establishing NFS shares, and scheduling backups. By the end of this tutorial, you’ll have a fully functional Proxmox server at your disposal.
Step 1: Updating Repositories
Before we dive into the Proxmox setup, it’s essential to ensure that your system is up-to-date, even without a subscription. Proxmox offers a free community edition, and updating repositories is a crucial first step. To do this, we first need to edit the repositories:
- This can be done using the GUI
- Disable the two
enterprise.proxmox.com/...repositories - Add the
pve-no-subscriptionrepository - Your repositories page should now look like this:
![repositories-config]() Repositories Configuration
Repositories Configuration
- Disable the two
Now update the repositories
1
apt-get update && apt upgrade -y

Step 2: Configuring Proxmox ZFS Storage Pool
Proxmox supports various storage backends, and ZFS is a popular choice due to its robust features. Here’s how to set it up:
If you installed Proxmox on a disk and manually limited its installation size, we need to build another partition on the disk. To do so:
1
2
3
4
5
6
7
8
 fdisk /dev/DRIVE #enter DRIVE name (sda1, nvme0n1, etc)
 p #print partition table
 n #create a new partition
 press enter #accept default value of partition number
 press enter #accept default value of first cylinder
 press enter #accept default value of last cylinder
 p #print new partition table
 w #save new partition table
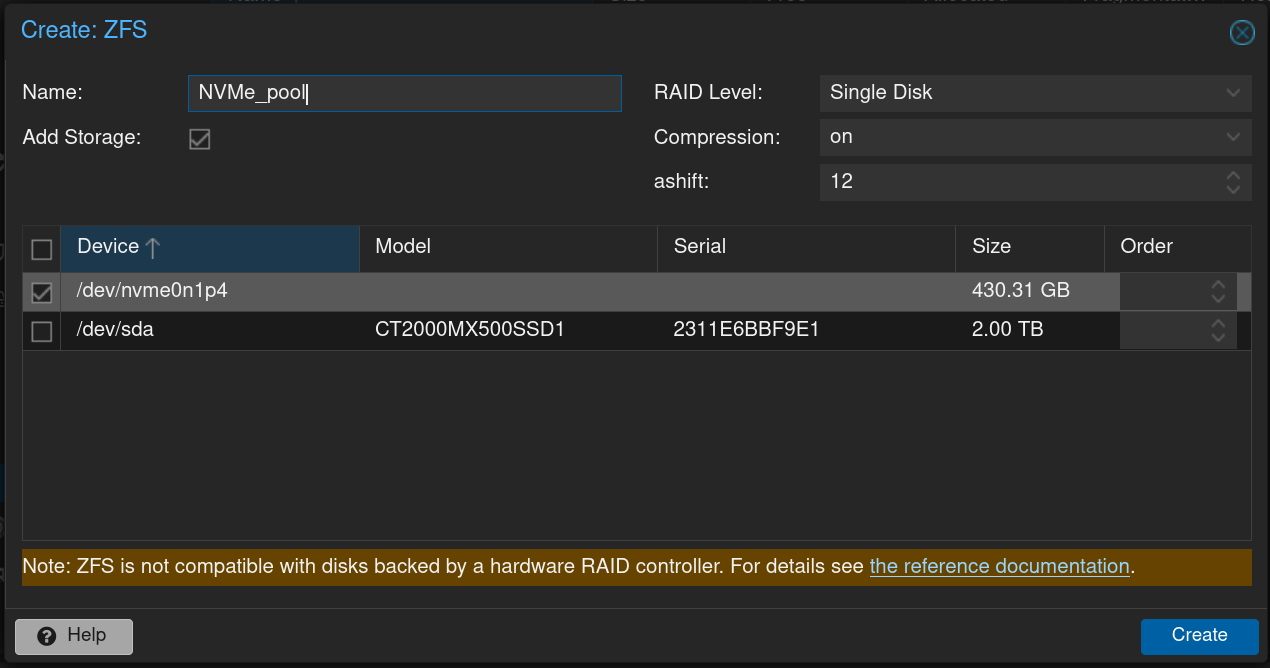
Go to disks/ZFS and click
Create:ZFS![nvme_pool]() NVMe pool
NVMe poolI now have a 430GB ZFS pool on my boot drive. In future posts, I’ll cover how to create new directories within your ZFS pool.
Step 3: Ensure SMART Monitoring is enabled
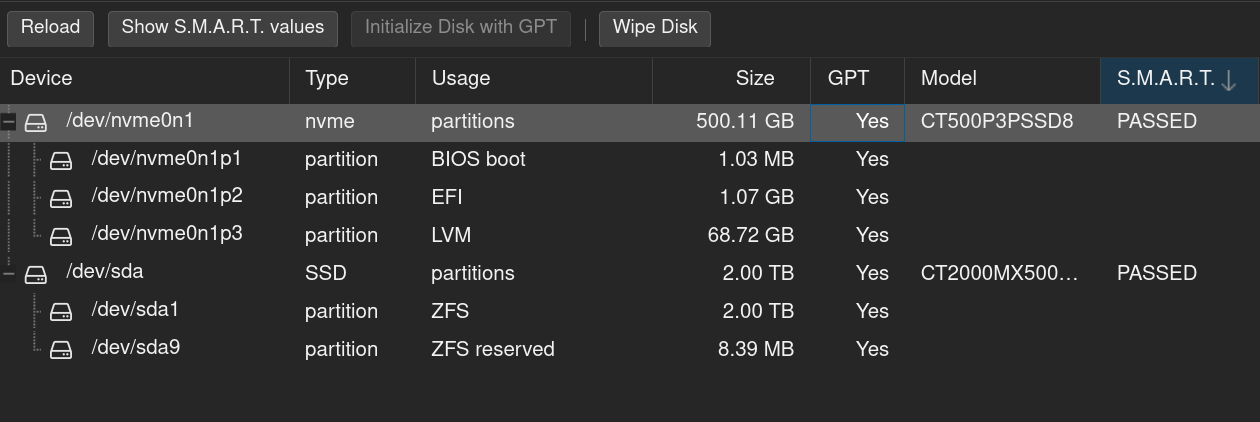
Ensuring the health of your hard drives is critical. To ensure SMART Monitoring is enabled using the GUI:
![smart-monitoring]() SMART Monitoring
SMART Monitoring- By default, SMART Monitoring is enabled
Using the command line:
You can get the status of a disk by issuing the following command:
1
smartctl -a /dev/sdX #where /dev/sdX is the path to one of your local disks.
- If the output says:
1
SMART support is: Disabled
you can enable it with the command:
1
smartctl -s on /dev/sdX
Step 4: Enabling PCI Passthrough (IOMMU)
PCI passthrough allows you to assign physical devices to virtual machines. Ensure that your CPU supports VT-d (IOMMU) and enable it in BIOS.
Edit the GRUB configuration file:
1
   nano /etc/default/grub
Add the following line:
1
2
 GRUB_CMDLINE_LINUX_DEFAULT="quiet intel_iommu=on"
 #change intel for AMD if you are running an AMD CPU
Comment out:
1
 # GRUB_CMDLINE_LINUX_DEFAULT="quiet"
Update GRUB:
1
 update-grub
Update modules:
1
 nano /etc/modules
Add the following lines to `/etc/modules
 vfio
 vfio_iommu_type1
 vfio_pci
 vfio_virqfd
Save and exit, and reboot
1
 reboot
Step 5: Making Proxmox VLAN Aware
To create VLANs in Proxmox, you can use the Linux bridge as a basis:
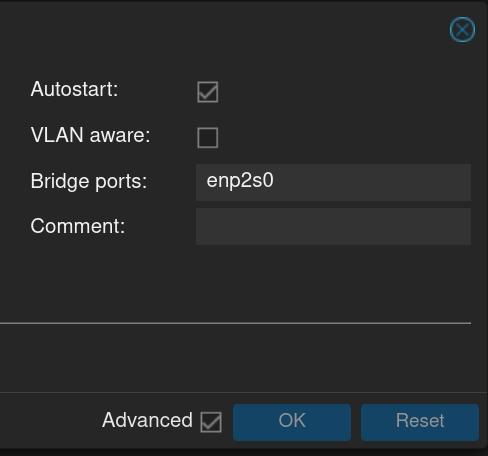
- Go to networks, select Linux Bridge, and edit
![vlan-aware]() VLAN Aware
VLAN Aware - Check VLAN aware and click OK
Step 6: Scheduling Backups with Proxmox
Regular backups are crucial for data integrity:
Log in to the Proxmox web interface.
Navigate to the desired VM or container.
Click on “Backup” and configure your backup options, including storage location and schedule.
Conclusion
Setting up a Proxmox server involves several essential steps, from updating repositories to configuring storage, enabling SMART monitoring, setting up PCI passthrough, VLANs, and scheduling backups. With this comprehensive guide, you can confidently build a robust Proxmox server tailored to your needs.